
You already know how beneficial product videos are to your marketing arsenal, but how do you create a lot of videos with limited resources?
A comScore study found that product videos provided a 35% lift for the featured product. According to the Kissmetrics post, Can Product Videos Increase Conversion Rates, viewers of product videos are 64%-85% more likely to buy after watching. Yet videos are still heavily underutilized by many of us. Why?
Perhaps because product videos can take considerable resources. A high quality outsourced ninety-second video can cost up to $25k. Creating a nice, polished video in-house can take weeks and burn through a ton of hours that your team doesn’t have available.
How do you create videos with limited resources?
Here’s how I created a series of product videos. Each video took only 3.5 hours to create.
Step 1: Stop Planning Product Videos
If you have ever been involved with a product videos, you know the importance of planning. You have to brainstorm ideas and then storyboard them. The storyboard is iterated between the designer and marketing team. A script is created, reviewed and changed, many times. Then you find a person who can read the script, and so on and so forth.
That is how I started out creating product videos. For many of my projects I didn’t have the budget for a professional voice-over actor. So, after all this preparation, the audio would be horrible. Then I would have to spend more time getting a good read and editing the audio.
When the projects were over, they had taken too much time. I wanted to be able to create a video for every new feature released and weekly video updates that could be pushed out through the social universe. So, I tried an experiment with no planning, storyboards, scripts or practice.
Instead, I had a five-minute meeting with the CMO/Product Owner and said:
“For our next video on the task management feature, I don’t want you to prep at all. We’re not going to have a script or storyboard. I just want you to explain task management to me as if you were having a conversation at a conference cocktail party. Very casual. You already know more than anyone about this topic, so I don’t want you to even think about it until we are recording”
The CMO was ecstatic, I had just saved him hours of work and the marketing team days if not weeks. By taking this no planning approach, you make it much simpler for the expert or talent that will be doing the talking. You also make it much easier for you and the marketing team.
You may be thinking, “well of course cutting out all the prep saves me time, but the video is going to suck.” Don’t worry, this is not the case. In fact, I would argue that the audio comes out much better. If your project has the budget for a voice-over actor and your outsourcing the video production, this probably isn’t the technique to use. But if you are using an internal person to be the voice, this technique produces far better audio in a fraction of the time.
Step 2: Recording Product Videos
When it came time to record, I met the CMO in his office and asked him to
“just casually discuss their task management feature. Again, as if I were a potential prospect he had just met at a conference cocktail party. I explained that this would be a ninety-second video, but that he didn’t need to worry about the time, just talk freely and I will edit the audio and make sure he sounds amazing.”
I’ve now done many of these product videos for many clients and have found that most of the time, on the first take, the person being recorded opens their laptop and begins doing a walk through of the product. I typically let them say their piece and capture the audio. Then when they’re done I say
“That is great, but lets try making it more like a casual conversation. I find that it is easier if you put your laptop away and just talk to me.”
Often, at this point the person being recorded will begin describing to you what they are planning to say. I like to capture this, because sometimes the person does a perfect job speaking to you in dry run while their not concerned about the audio.
Finally we typically do two or three recordings. I find that if you make good eye contact, the person being recorded will start to talk directly to you and begin talking more casually.
Each recording is only a few minutes, so the whole meeting usually takes only twenty minutes. At this point you have only taken twenty-five minutes of the expert’s/talent’s time as well as yours and zero of anyone else’s, compared to weeks spent executing the traditional video production process.
Equipment
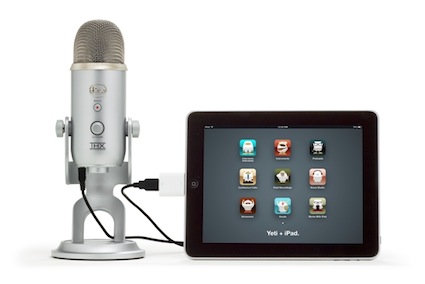
I use a Yeti Blue mic. The Yeti Blue is a professional quality USB mic that plugs directly into your laptop and it only cost $99, so it is perfect on a budget.
My laptop is a MacBook Pro, so I use the free edition of Apple Quicktime to do the recording. I’ve played with a lot of audio software and Quicktime is just so simple that it is my favorite. I end up editing the audio in another application, which I will walk you through later.
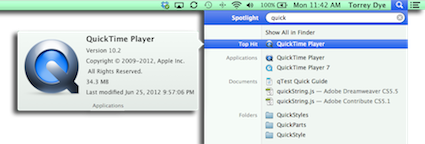
If you have a Mac, open up Quicktime.
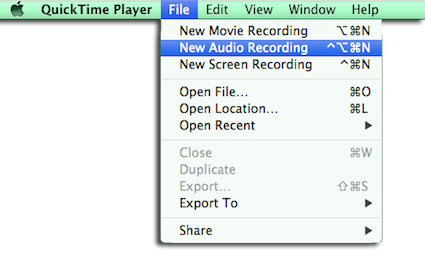
Go to File and choose New Audio Recording.
Press the upside-down white triangle and make sure the Yeti Blue mic is the microphone in use.

When it comes time to start the recording, simply hit the red circular button.
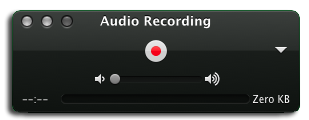
When it comes time to stop, hit the button again.
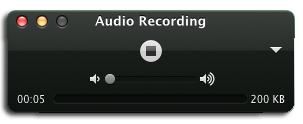
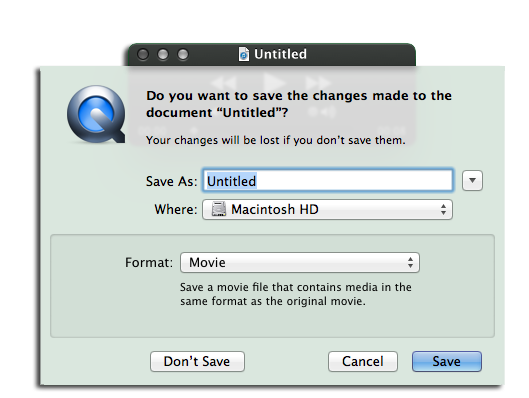
At this point your recording is untitled and I haven’t found an intuitive way to save, but when you close the file it will provide you a way to save.
If I can’t be in the same location with the person, I use Calltrunk to record the person over the phone. Calltrunk makes recording over the phone extremely easy and is pretty inexpensive.
Step 3: Product Video Audio Editing
Audio editing is often a task left to the person editing the product videos. This person may be someone you are outsourcing to, an internal designer or technical person. Instead of these folks, it is much more effective to have the marketer in charge of the project do the audio and editing – it is super simple to do. It may feel scared if you have never done it, but I will show you a super simple and easy way to edit the audio.
Think of the audio editing process as the same as the process to write a case study: you wouldn’t leave that to the designer. You’re crafting a story with words and making sure that story is in line with your brand messaging.
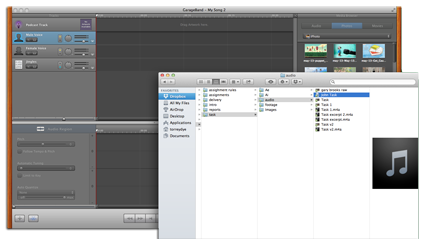
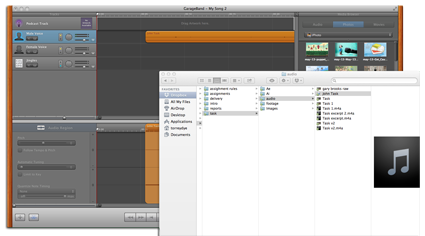
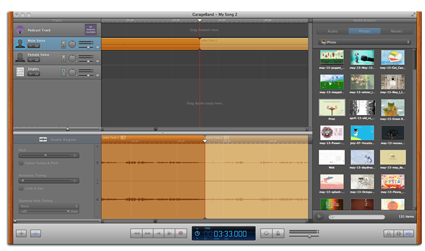
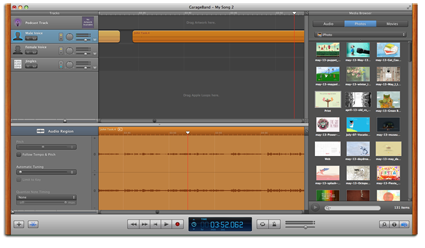
I use Apple’s GarageBand that came with my MacBook Pro to edit the audio. There are a lot of choices for audio editing, and I haven’t thoroughly reviewed them. I just found GarageBand to be simple and easy to pick up when I was starting out. It was also free, but what I like the most is it has a setting for podcast that automatically adds all the audio effects needed to make the person sound good. I’ll describe this in more detail in a moment.
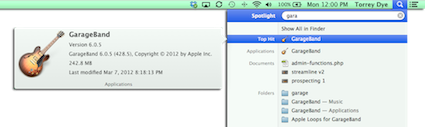
Open GarageBand.
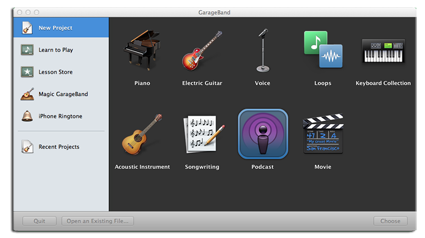
Choose New Project and then Podcast. When you choose Podcast GarageBand.
Name and save your file.

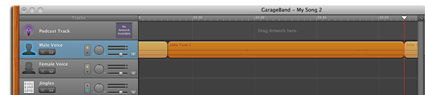
Then drag your Quicktime recording into the Podcast Tracks.
Drag the audio file to the 0 second line and press the space bar to listen. You may need to listen a few times before you begin editing.
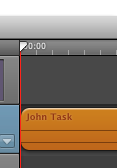
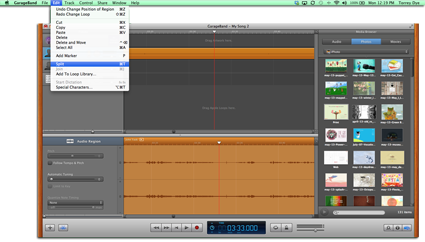
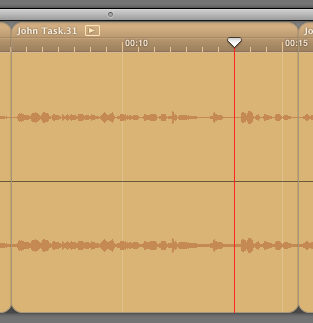
Once you are ready to edit, start the audio from the beginning and listen for the major stopping points. For example, I recorded my client’s CMO for thirteen minutes. He went three and half minutes before making his first stop. I paused GarageBand when he stopped talking by hitting the spacebar.
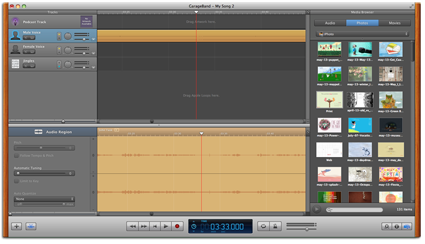
The selected the audio track. You know it is selected because it turns dark orange. Finally, I split the track by pressing the Command button and the T button.
Or you could go to edit split track.
I then continue to do this for the reminder of the recording. Go ahead and delete irrelevant sections of the audio. For example, in the task management recording, the CMO starts to talk with me from the three and half minute mark to the three minute and fifty-two second mark.
To delete the section, I make another cut at the three minute and fifty-two second mark.
I make sure the right section is highlighted dark orange. Then I press the delete key or Edit – Delete.

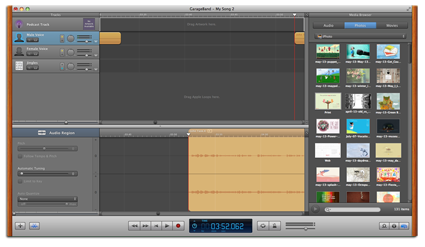
Finally, drag the section that starts at three minutes and fifty-two seconds closer to the beginning segment.
Continue to go through the recording editing the major sections. I was left with about five minutes of audio once I had edited out all the main irrelevant sections. Our goal was to have the video be ninety seconds, so I needed to do further editing. We chose ninety seconds because we have found most people’s attention span gets short after a minute and a half. Even ninety seconds can be to long for a lot of people, as explained in this study by Wistia, Does Length Matter? It Does For Video!.
To cut the audio down further, you have to start listening for the sections that tell your story in your goal time. At this point, you will start to be very familiar with the audio. Go through and cut the sections you like best. Place those sections at the front and put the rest towards the back until you are a little over your goal time.
Listen to these sections and rearrange them by simply dropping and dragging until the full sequence is to your liking. Once the sequence is good, go through and cut out the errors such as “um”, “like” and other noises.
To cut out a word such as “um” that is in the same sound wave as words you want to keep, you need to look for where the unwanted word wave dips and make a split. You may not get it the first time, no worries, just press the command button with the z button to go back or go to edit Undo Change Loop.
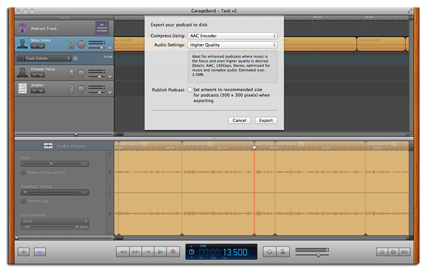
Then try again until you are satisfied with the split. Export the video when everything is to your liking. Go to Share – Export Podcast To Disk. I like to choose AAC Encoder for the compression and Higher Quality for the Audio Settings. Press Export and save it to your location of choice.

It is a good idea to send the audio to your teammates if you have other people involved with the project. This will give them a chance to review before video editing is done. Once everyone has agreed to the audio, I like to get a transcription that I can add to the video page for SEO benefits. I typically use Rev.com for the transcription. They often get the transcription to me in the same day and it only costs one dollar per minute.
This process typically takes me less than an hour. So, at this point you would have spent no more than an hour and a half. That is about the time it would take to brainstorm ideas for a video using the traditional process.
Step 4: Product Video Editing
Providing you a step by step tutorial on how to edit video in this format is probably less than ideal, so instead I’m going to provide the strategies and tactics that I have seen work best for creating a ninety second video in a few hours.
If you are interested in learning how to create videos, I highly recommend Lynda.com. They have online classes that allow you to learn how to create videos, edit audio and much more. In fact, I took the Lynda.com two-day course on Adobe After Effects several years ago to learn how to do video editing. It only cost about thirty dollars for one-month access to all of their classes.
The biggest mistake I made when I first started creating videos was to picture a scene or concept for the video before I had the audio in the video editor. Even without traditional planning, it is easy to start thinking about what would be a cool thing to happen during the video. The problem is, once you start predetermining what should happen, you spend way more time trying to make it work in the video instead of letting the audio organically dictate the visuals that best support the words. This may seem like an ambiguous concept, but the best way to avoid it is to go into the video editing with a clean slate.
I use Adobe After Effects for most of my video editing. The process I find that works best is to load the audio into After Effects and listen to the first ten seconds. I find it best to look at the video in ten-second sections. If the screen is too static for over ten seconds, people will loose interest. On the other hand if too much is happening in the first ten seconds, it begins to be to busy.
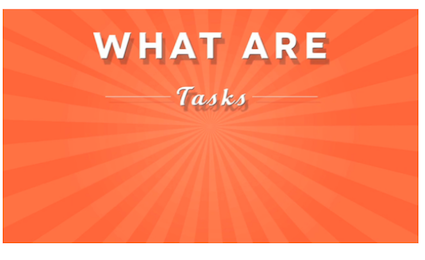
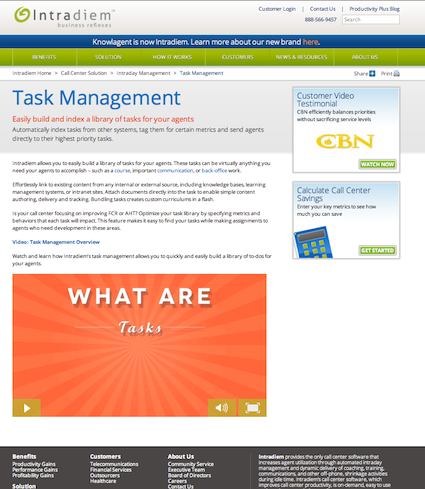
I look for the main points of the section and then determine what visuals would best help reinforce those main points. For example, in the task management video the first line is:
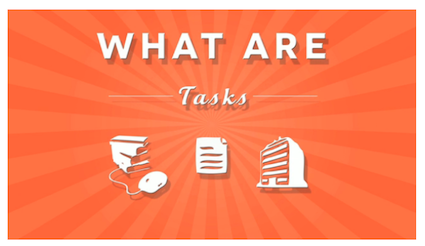
“Tasks are everything from a course to an article in a knowledgebase, a back-office task”
So I had the scene open up with What Are Tasks so the audience would know this section is about what tasks are. You can see the video at the end of this article, but you will notice that the effects are fairly subtle. The words are moving slightly to pull the eye and make them feel like they are floating.
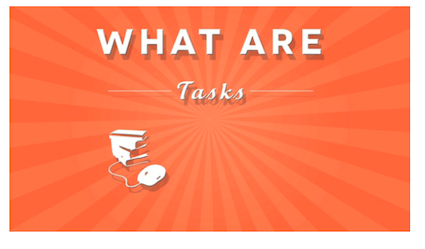
When the video says “from a course,” an icon for a stack of books with a mouse attached appears along with a popping noise. Again, these effects are not over the top but they are designed to hold your attention, be visually pleasing and reinforce the main point while being easy and quick to produce.
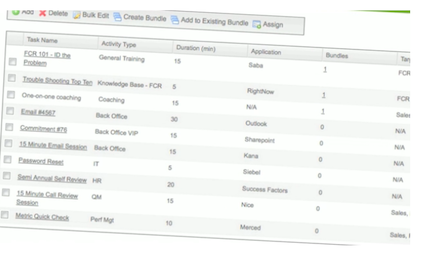
The next scene fades into a close up of the product, in this case a SAAS solution for call centers. The application is slowly moving to hold the audience’s attention and reinforce that the main points being discussed are about the application. In many cases, I will create an effect to blur out most of the application except for the area being discussed to draw the eye to the main focal point.
Using these techniques you can complete your video editing in under two hours making the entire project take less then three and a half hours.
See the entire video here:
This is a feature video and the audience would not typically find it until they knew what the application was, so the video doesn’t have a lot of intro. Instead, it is the call to action at the bottom of the product feature page as shown here:
We used Wistia to host the video. I highly recommend checking out Wistia for your video hosting. They are very easy to use, have a nicer video player then YouTube and they can integrate with your marketing automation system so that you can track what leads watch what videos and have videos embedded directly in emails. They are also very reasonably priced.
Summary
Don’t be fooled into thinking you don’t have enough resources to create the product videos you need. All you need is a few hours and a little imagination.
That’s it!
Because most people are trying to keep up with the Jones’ latest high production, high cost explainer video, their missing opportunities to utilize a higher volume of videos across social media, email and deeper in their websites. Don’t fall into this trap. You have all the resources you need.
How would you utilize product videos if you could produce them quicker?
About The Author
 Torrey Dye is a B2B Marketer and founder of FunnelCake Labs.
FunnelCake Labs helps B2B companies create amazing content more quickly.Google+
Leave A Comment